
I don’t usually write “how-to” guides, let alone write topics that aren’t deeply embedded with Microsoft Intune or PowerShell, but I recently hit an issue when trying to setup a Windows Autopilot ARM based virtual machine using UTM on my Apple Silicon (humble brag) based macOS device.
With the recent announcement of the next generation of Windows Autopilot and Windows Autopilot device preparation now being official, I imagine there are now more and more people that are using macOS devices but need to test Windows Autopilot in a Virtual Machine, and thought, here’s an easy on trend blog post, that I should share the solution to the issue I encountered.
As always though, before you go and jump to how I fixed the problem, you should probably read the entire post to get a full picture of the scenario.
Windows Virtualisation #
As I spent all my pocket money on a MacBook Air M1, I’ve got none left to pay for virtualisation apps, so I use UTM; I mean, it’s also a lot better to use than others out there, and supports virtualising many operating systems natively without emulation, including Windows 11 ARM versions.
So if you’re not using UTM, go and download it from the website, or install it using Homebrew if you’re that way inclined:
brew install utm
Before we go and setup a new Virtual Machine, we need to get the Windows 11 installation media, otherwise we’re not going to make any progress.
Windows Installation Images #
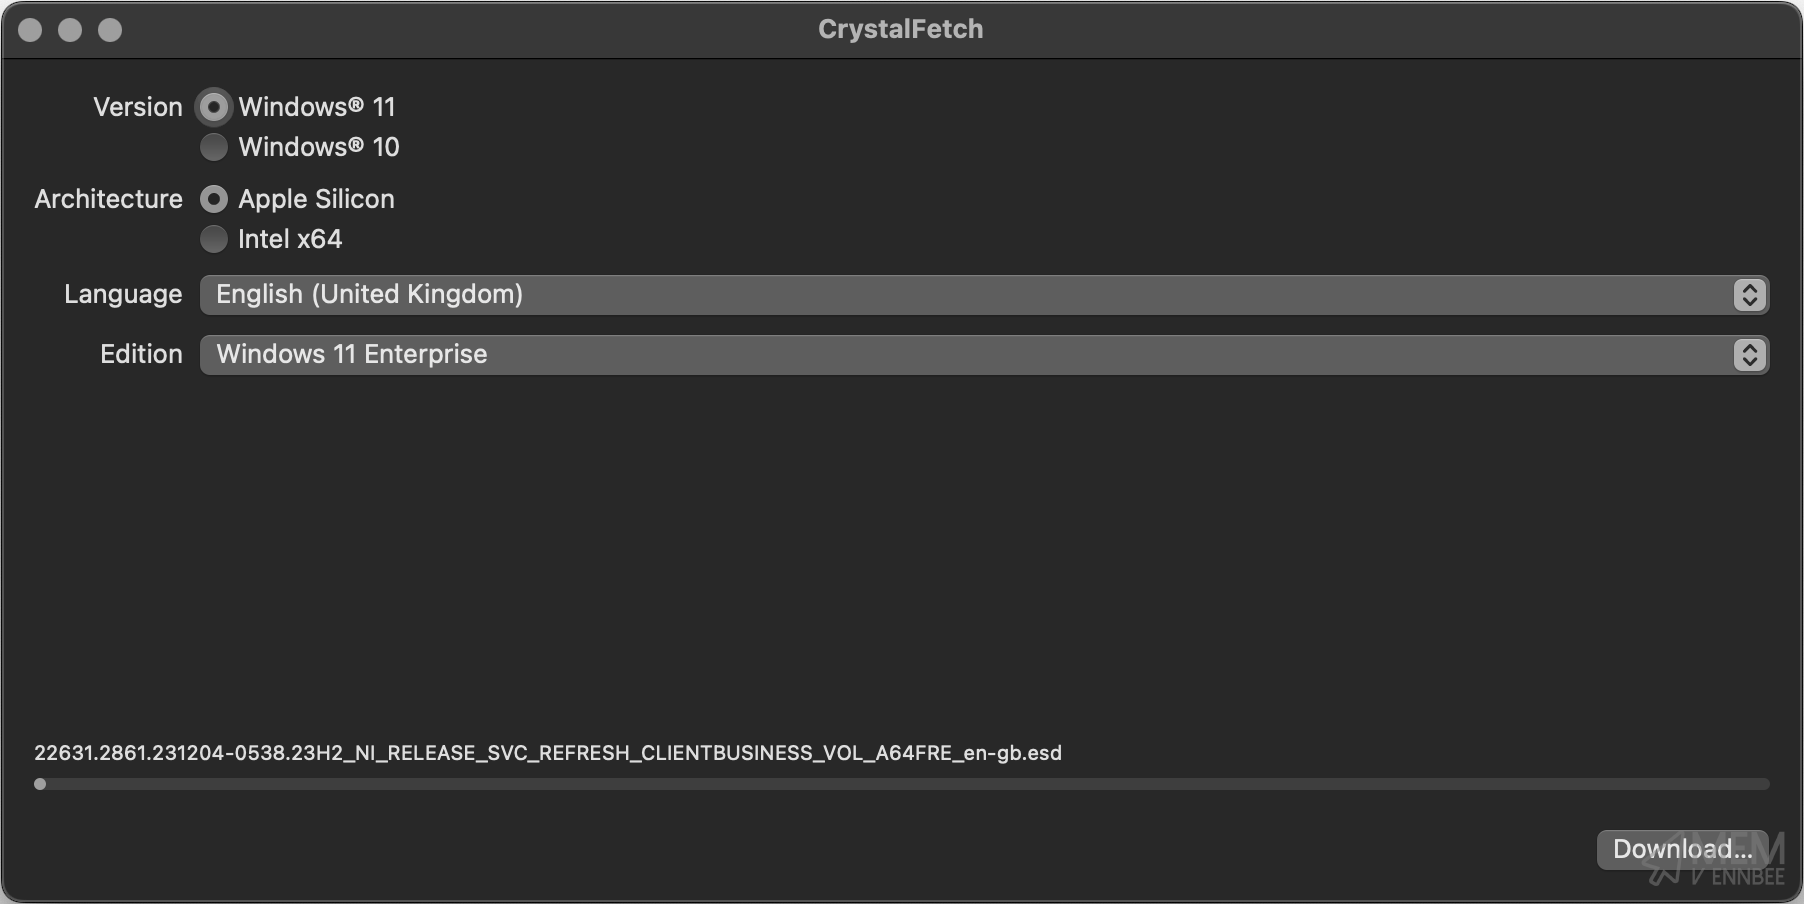
To make life a lot easier when downloading the supported iso files for Windows 11 ARM, I’d suggest installing CrystalFetch. This gives a user interface to downloading the Windows installation image, without having to build them yourself.
You can download CrystalFetch either from the App Store, or again install it with Homebrew:
brew install crystalfetch
Once you’ve installed CrystalFetch, launch it and kick off the download of the version of Windows 11 you want:
Now that we have our installation media downloaded, we can go setup a new Virtual Machine in UTM.
Virtual Machine Setup #
Opening UTM, you’ll need to select Create a New Virtual Machine, then following along with the video below to configure it:
Now that we have our Virtual Machine configured, time to power it on and install Windows.
Windows 11 Installation #
After starting the machine, smush the keyboard when prompted to boot from the iso that we attached during the setup, we should have all at least installed Windows 11 once before, but watch the video if you need a refresh.
We’re not bothering with a product key, as a) I cba typing one out, and b) we can just use Microsoft Intune or Subscription Activation to sort out keys and the license later on.
Windows Autopilot Preparation #
With our newly built Windows 11 ARM Virtual Machine now available and booted, for the original Autopilot deployment configuration we still need to capture the hardware hash from the device and upload this to Microsoft Intune.
I’m a great fan of the work Michael Niehaus has done to improve the Windows Autopilot process overall, so we’re using a PowerShell script based on his initial version to get the hardware hash.
Hardware Hash ID #
We can start this capture process by running the below commands after launching a CMD prompt using Shift+F10 on the keyboard:
- Run
powershellfrom the CMD prompt. - Run
Set-ExecutionPolicy Bypassto allow the installation of scripts. - Run
Install-Script Get-WindowsAutopilotInfoCommunityand accept all prompts. - Run
Get-WindowsAutopilotInfoCommunity.ps1 -Onlineto capture the hardware hash, authenticate to Microsoft Entra, and upload the hardware hash to Microsoft Intune.
You can see the overall process in the video below:
Now after we’ve authenticated to Microsoft Entra, there appears to be an issue…PowerShell you’ve got red on you.
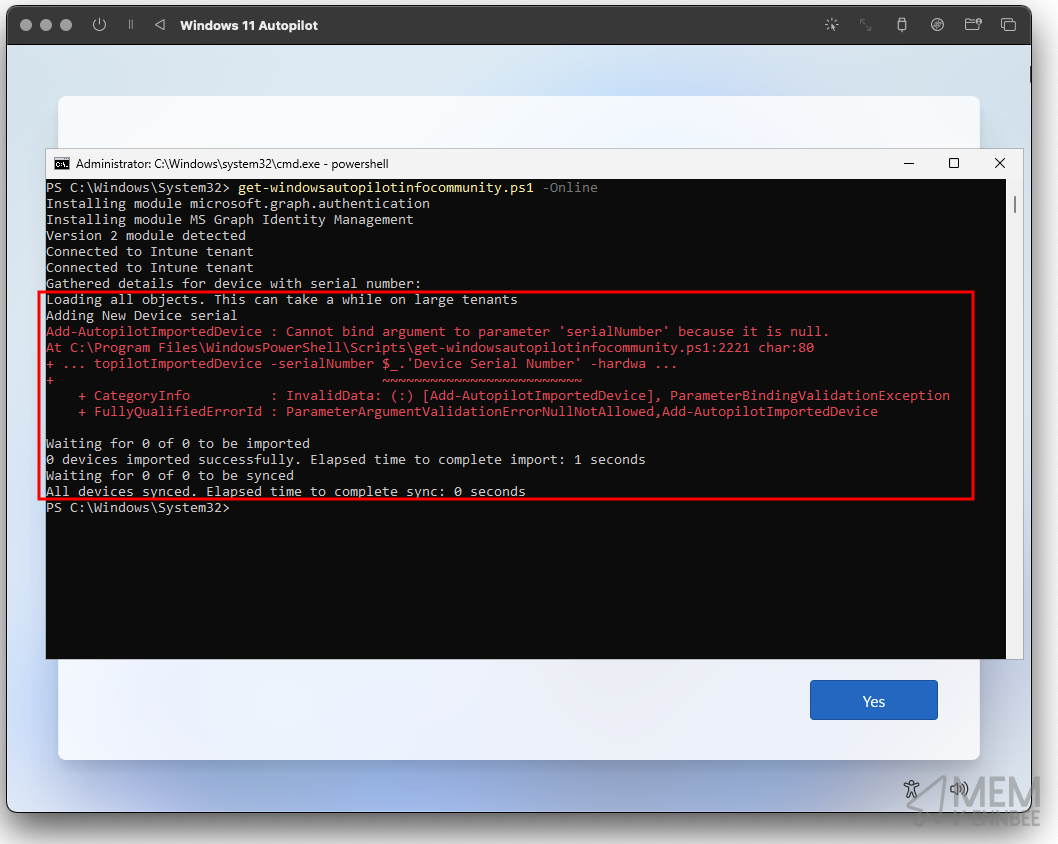
We don’t need to be a genius here to see that the error given relates to a lack of serialNumber on the virtual machine itself, which is required to build the hardware hash value that we need to add the device to Microsoft Intune as an Autopilot device.
So what gives?
Adding a Serial Number #
Well sadly our Virtual Machine is missing a serial number, it can’t pull a rogue one through from the macOS host like it would using Hyper-V on a Windows host, and UTM isn’t giving it one. So I guess we need to sort this out ourselves.
As UTM is built upon QEMU we have the ability to pass through QEMU parameters to the Virtual Machine, one of which gives us the option to configure a serial number. Wonderful.
Go ahead and gracefully shutdown your Windows Virtual Machine, and right click and select edit in UTM:
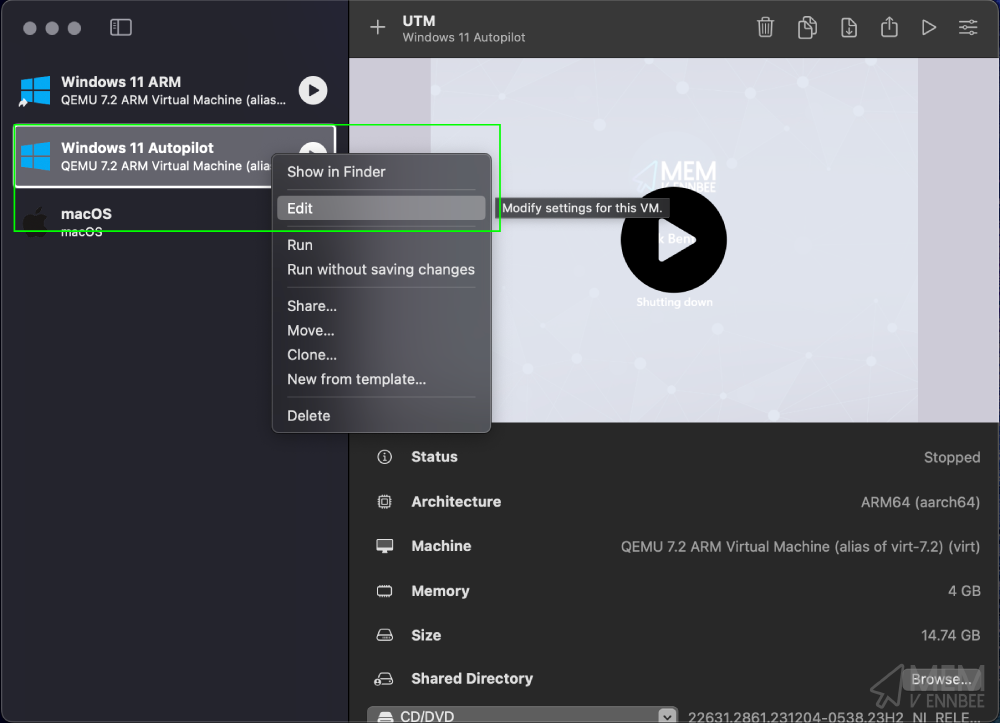
Then navigate to QEMU > Arguments:

Selecting New we can add in the following line:
-smbios
Followed by selecting New again, to add in the below where XXXXXXXX is the value of a serial number:
type=1,serial=XXXXXXXX
So for example:
type=1,serial=DNuesTLjtKit
Which should look like the below in the parameters:
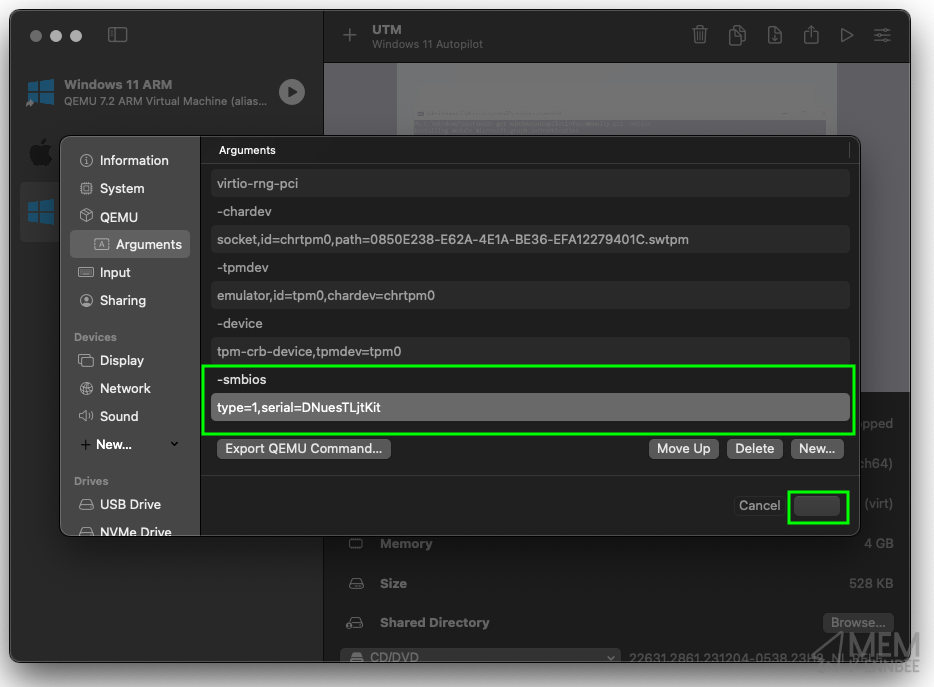
Select Save, which on the screenshot is the button next to Cancel but for whatever reason in dark mode you can’t see the text.
Windows Autopilot Deployment #
Now we’ve added in the required serial number, go ahead and power on the Virtual Machine and we’ll try the capture again.
As we’ve already installed the required modules and set the PowerShell execution policy, we just need to launch the CMD prompt again using Shift+F10, running the below commands:
- Run
powershellfrom the CMD prompt. - Run
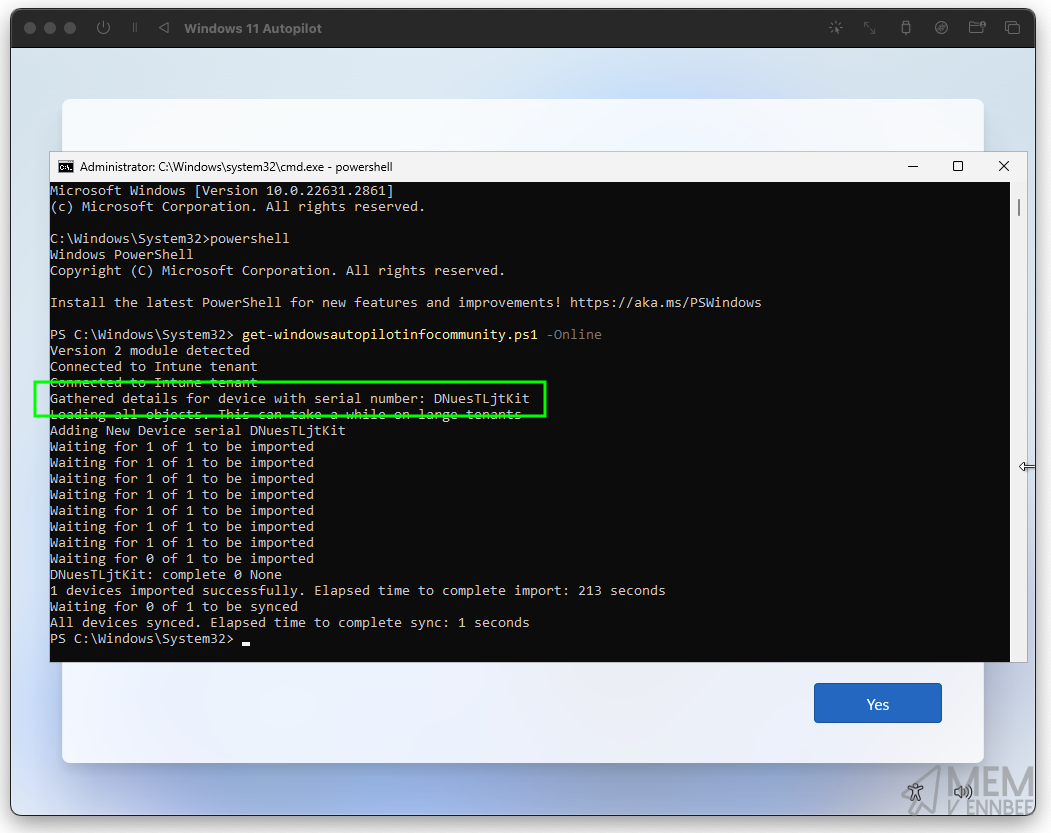
Get-WindowsAutopilotInfoCommunity.ps1 -Online
If you’ve done all this in good time, your original authentication token will still be valid, if not you will be prompted to authenticate to Entra again, either way the script should happily run and capture the hardware hash:
We can see now that as the device has a serial number, the PowerShell script can successfully capture the hardware hash and upload this to Microsoft Intune:
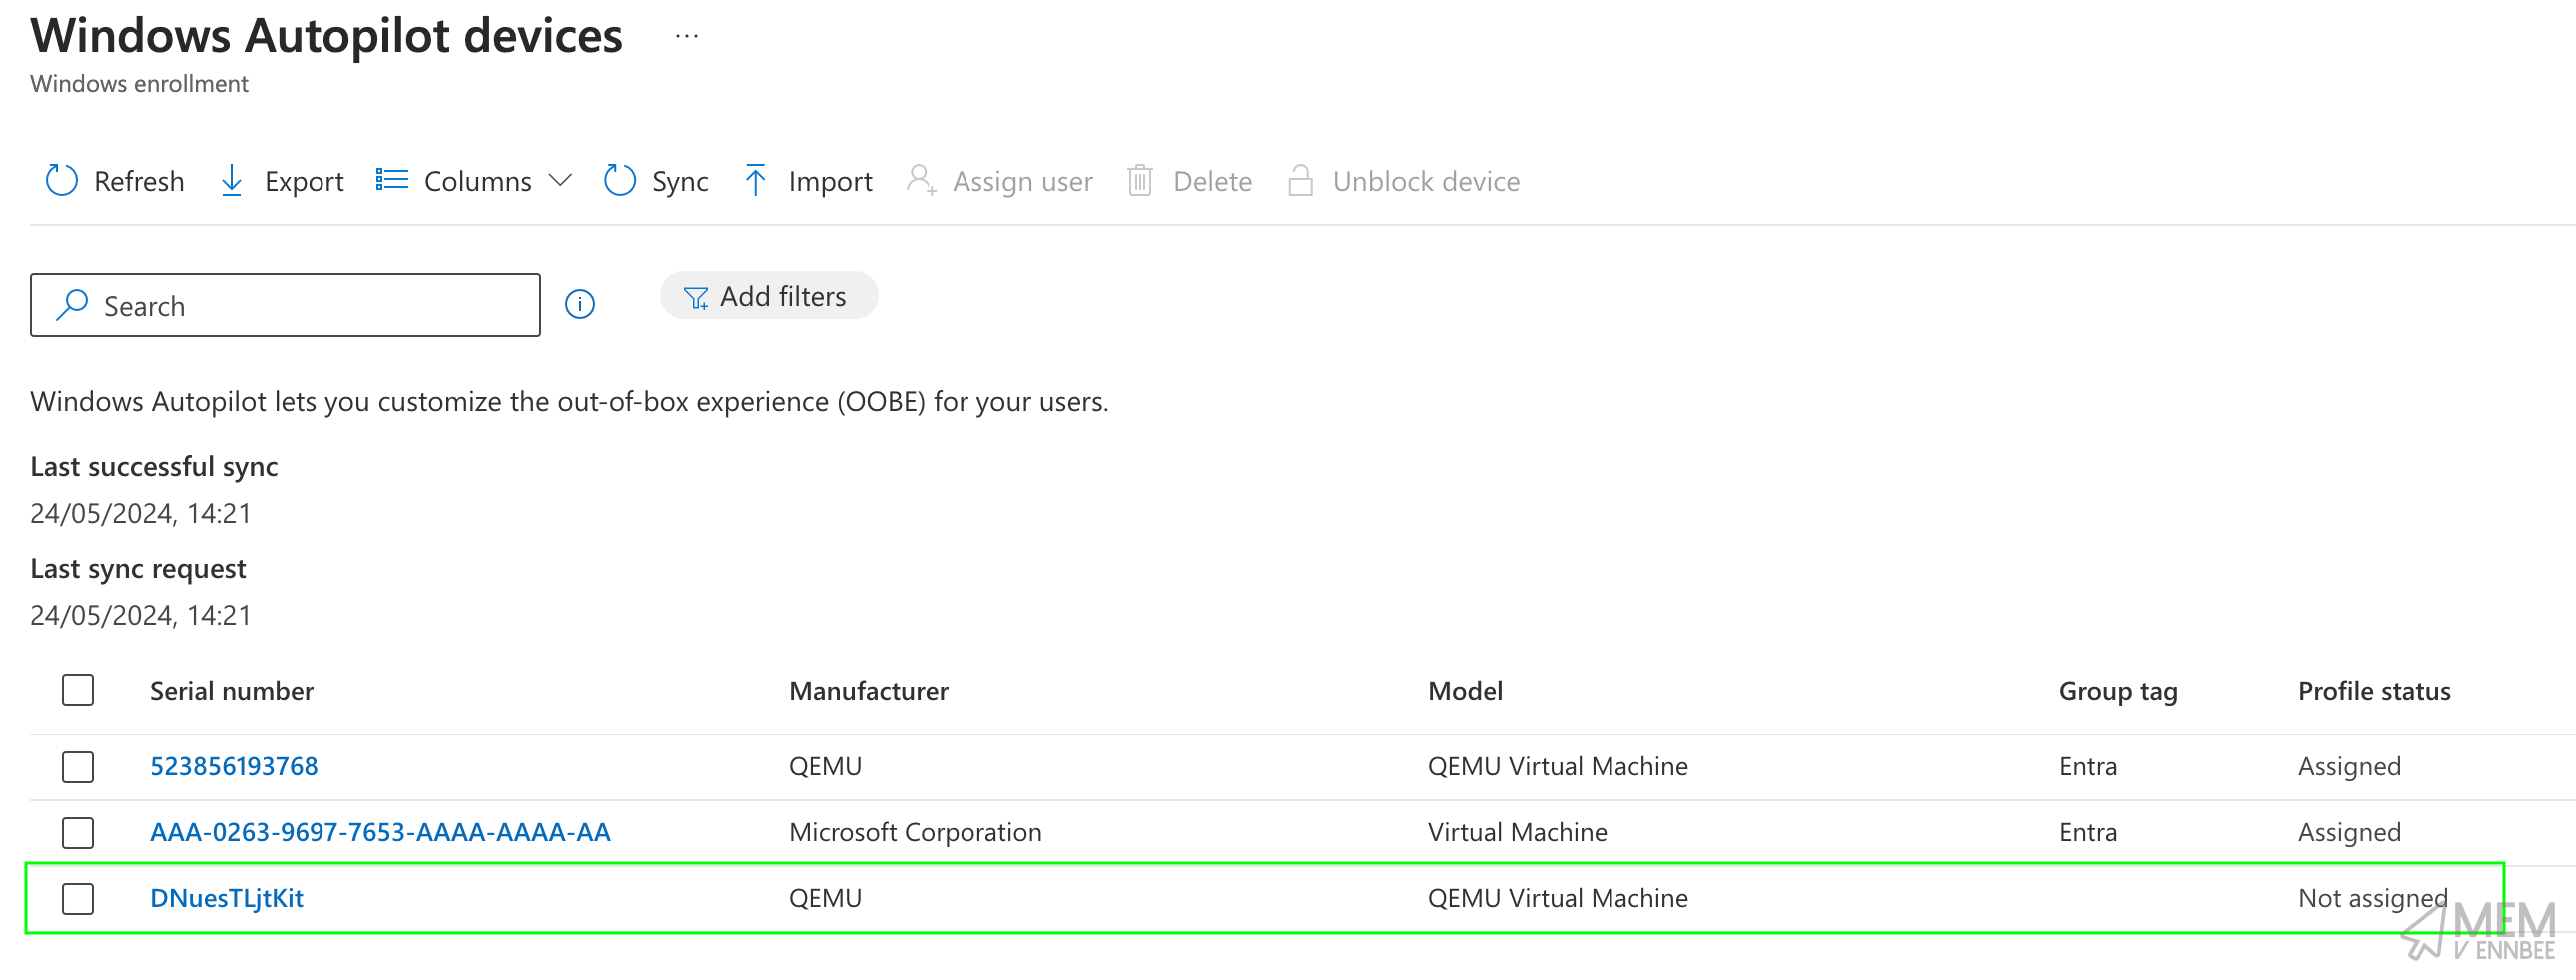
We can check the progress of the upload in Microsoft Intune, so navigate to Devices > Enrollment and under the Windows Autopilot heading select Devices, and we should now see our newly uploaded device:
We could have assigned a Group Tag as part of the PowerShell script using:
Get-WindowsAutopilotInfoCommunity.ps1 -Online -GroupTag Entra
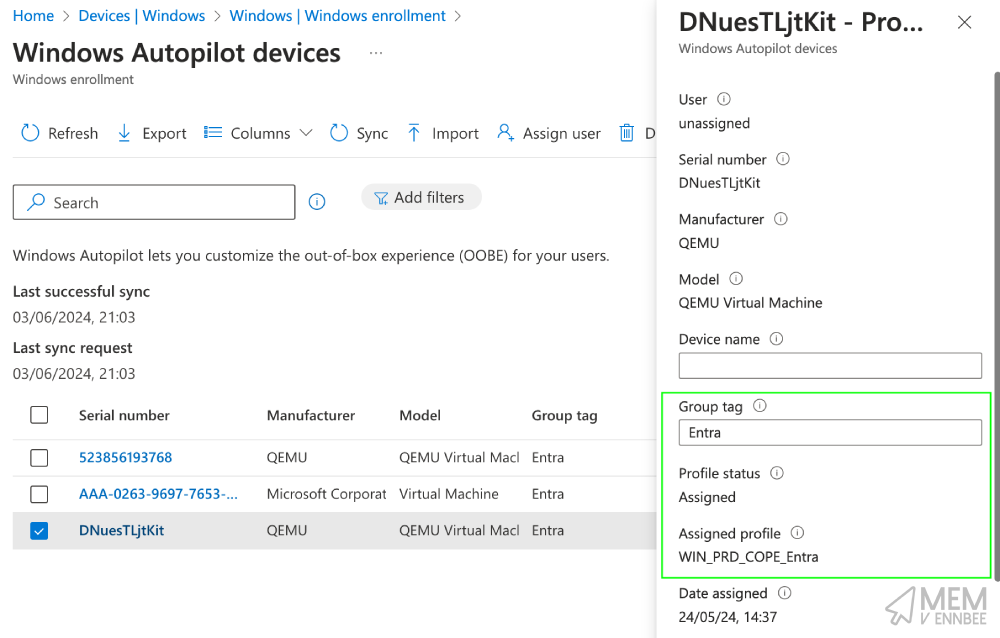
But I didn’t, so assigning that Group Tag now will allow for a Deployment Profile to be assigned:
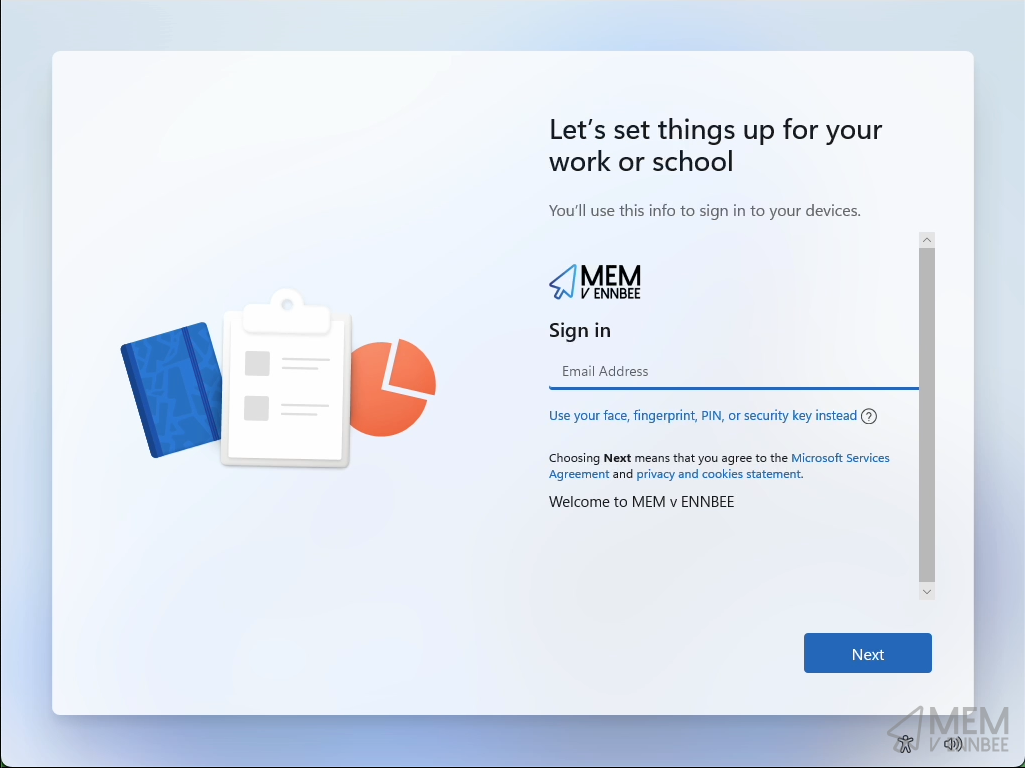
We can now restart our Windows 11 device, and low and behold it’s ready to start the Windows Autopilot deployment process:
Or if you really want to watch the more of the process:
Right, that’s it, a new Windows 11 ARM Autopilot device enrolled in your Microsoft Intune tenant and ready for you to do whatever you want with it.
Summary #
This might have seemed like a long winded post for something as simple as adding in two parameters to the Virtual Machine in UTM, and you’re right, it was.
But now that you know how to add a serial number to a Windows 11 Virtual Machine on macOS, you can always utilise this with some of the optional steps for Windows Autopilot device preparation, using Corporate Device Identifiers allowing for uploading of Windows device identifiers (serial number, manufacturer, model) ensuring that only trusted devices go through Windows Autopilot device preparation, (once it’s no longer a known issue 😞).
At least now you can test your Windows settings on an new Window 11 Autopilot device from the comfort of your precious macOS device, just like I do 😅.